| Jack the car up and place it on axle stands, install wheel chocks. Disconnect the battery | |
 |
Slacken off the alternator belt, and remove it |
 |
Unclip the earth strap, remove the cold air feed snorkel to the alternator and undo the alternator mounting bolts (2) |
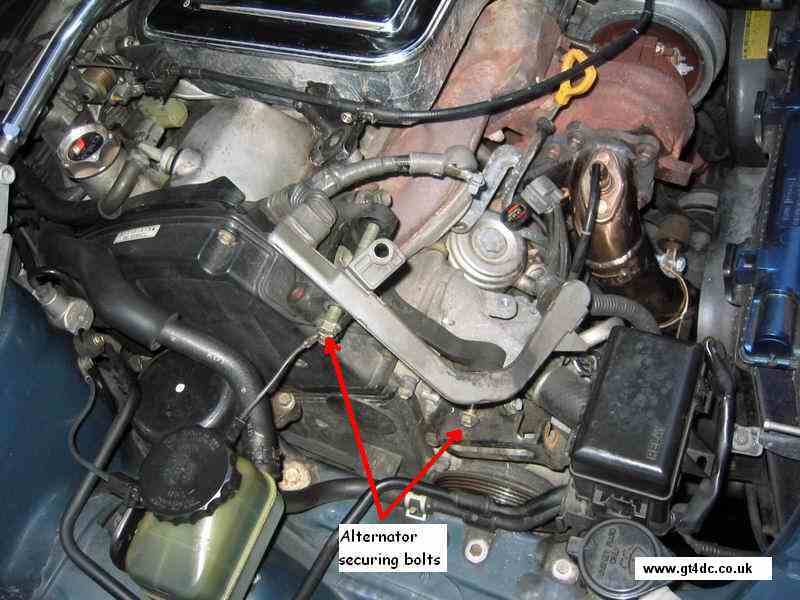 |
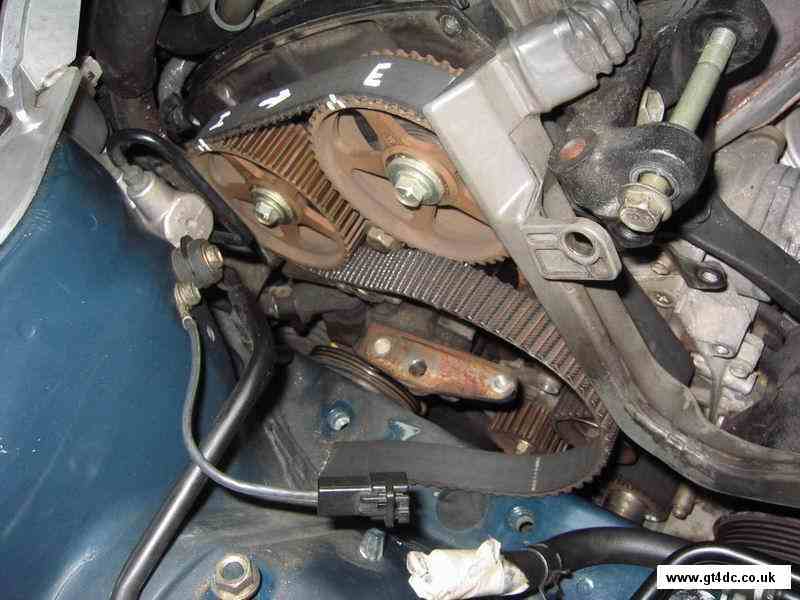
Undo the alternator power connection, charging connection and lambda sensor wiring and remove the alternator from the car. Note you may have to lever this out from the securing bracket as it's a snug fit. Note in this picture the Tensioner pulley has also been removed for access purposes and also to replace the worn pulley bearing |
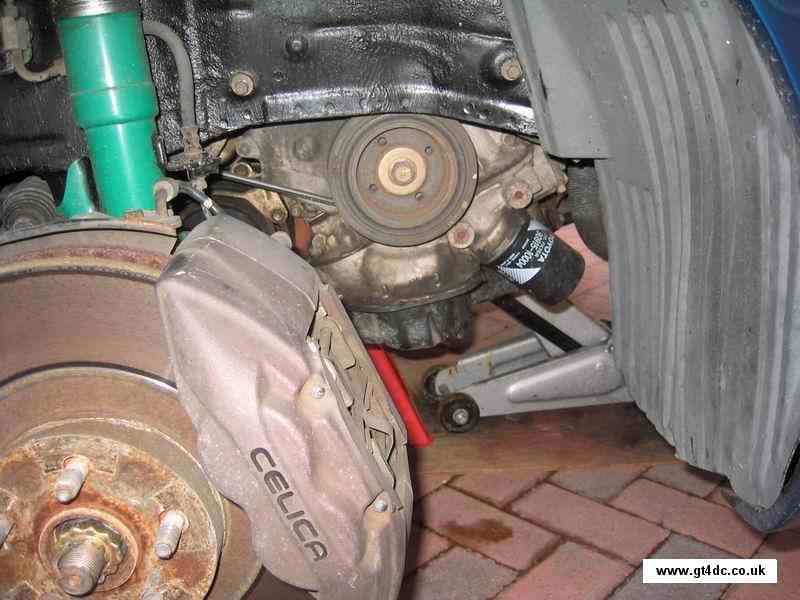 |
Undo the 10mm head bolts and remove the Drivers side engine under tray - this will allow access to the engine mount and the cambelt area |
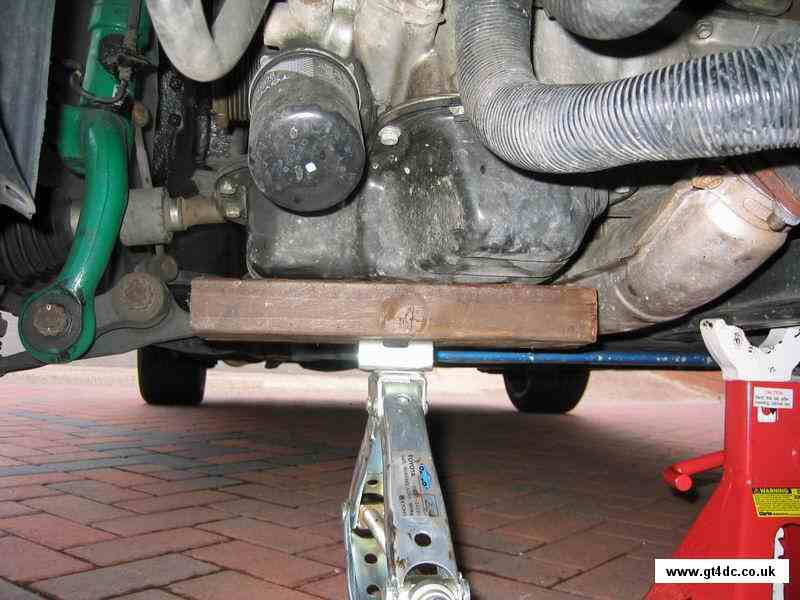 |
Place a nice thick piece of wood under the black sump as shown. The wood is here to spread the load across the sump and prevent any nasty damage. Adjust the jack to take the weight of the engine so that when the drivers side engine mount is released the engine does not go anywhere. This is also useful to jack the engine up and down to gain a little better access to the cambelt top cover bolts etc |
 |
Next, remove the 2 upper bolts and the nut underneath that secure the engine mount to the engine |
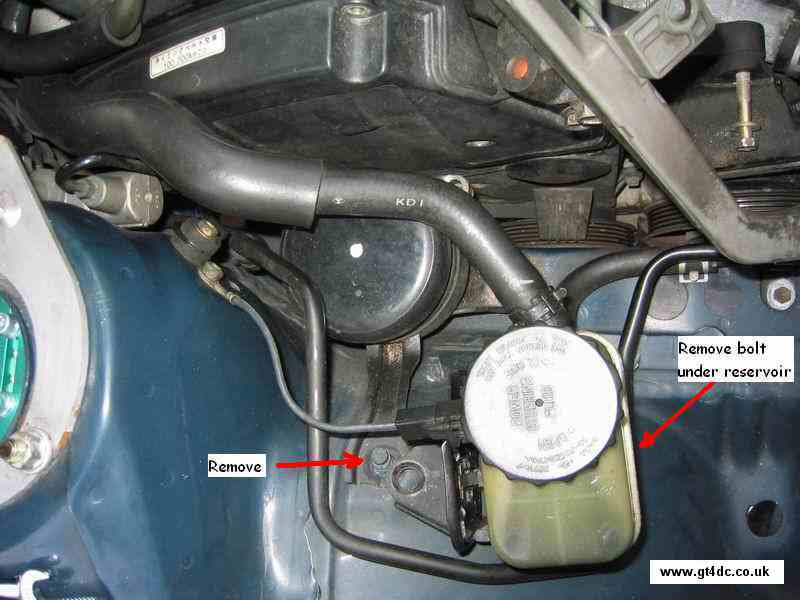 |
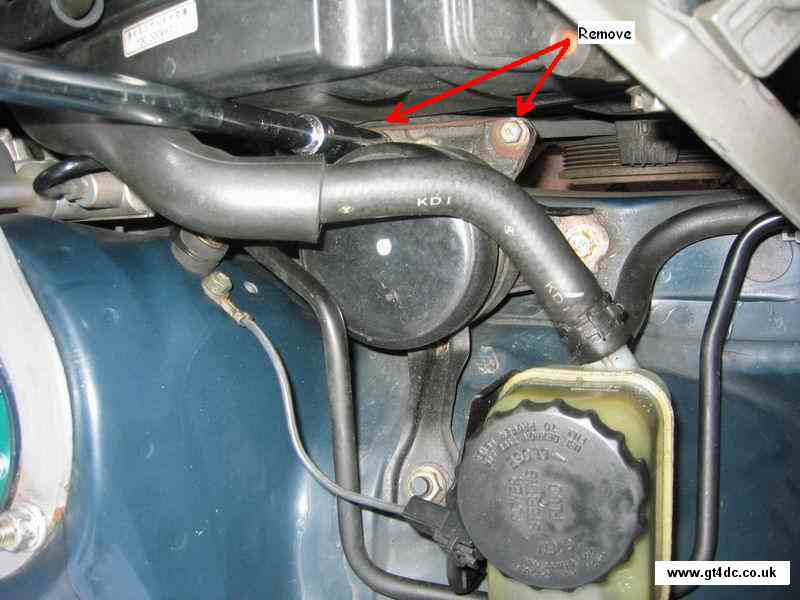
Undo the nut and bolt that secures the power steering reservoir to the car, so that you can get access to the chassis engine mount bolts |
 |
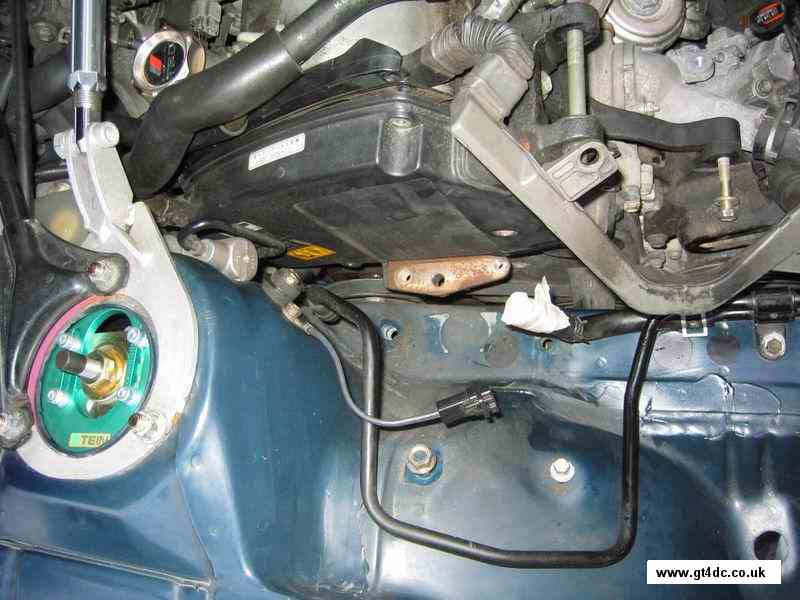
Undo the 2 engine mount chassis bolts and remove the mount. Note that the jack you placed under the sump earlier is helping to support the engine |
 |
Undo the lower hose from the power steering reservoir and drain the ATF from the hose and reservoir and dispose of the old fluid. Then, remove the reservoir completely - I also covered the ends of the hoses to prevent ingress of crap! |
| Remove all the upper timing belt cover 10mm headed bolts (5 in number) to expose the cambelt etc you may find that jacking the engine up and down aids access to the most awkward bolts | |
|
Place a socket onto the crank bolt and turn the engine over (turning the engine over clockwise), until the crank pulley is aligned with the zero mark and also so that the camshaft pulleys have the "dot" at the top of the pulley, as shown. This will provide a base setting should everything go wrong! (It won't!) If the "dot" on the camshaft pulleys are not aligned with the crank then simply turn the engine over one more time to ensure that all the marks are properly aligned |
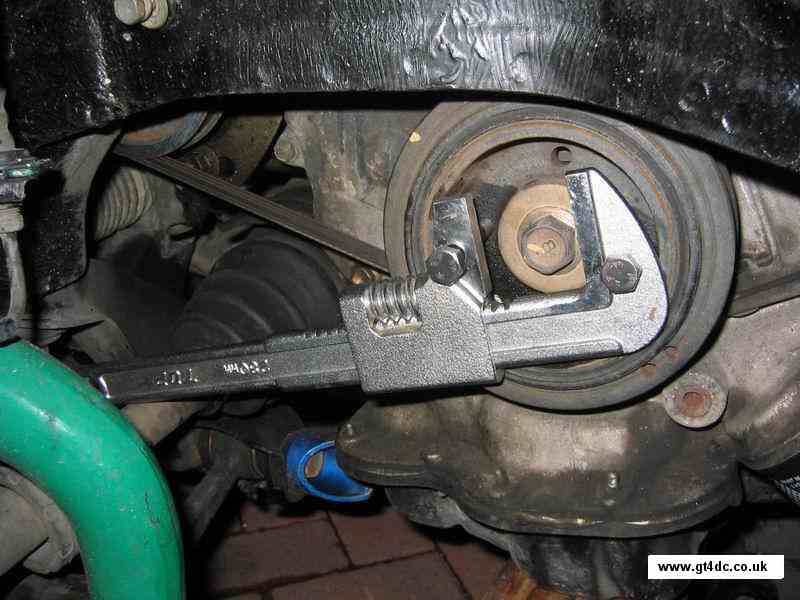 |
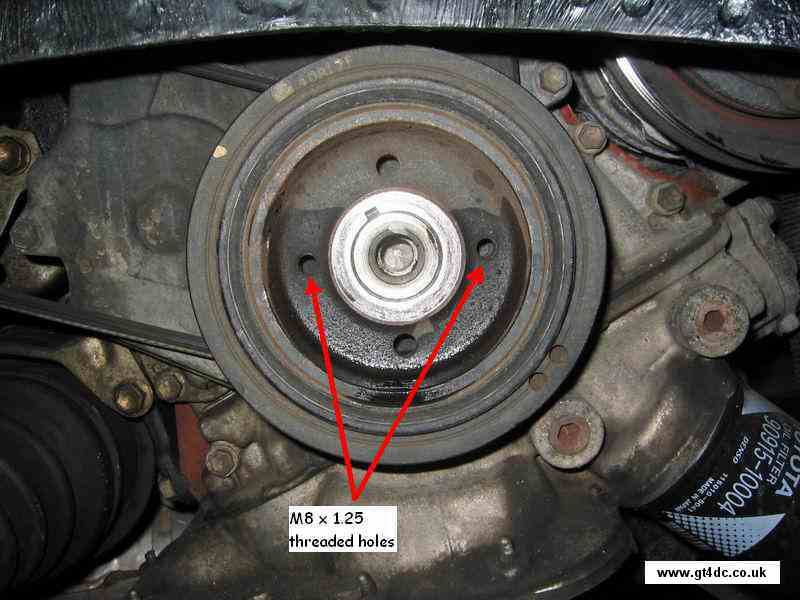
Now it's time to bring out the special tool to remove the crank pulley! The tool is the cheapest and poorest quality adjustable spanner you can find. Into this drill 2 holes to accept a couple of M8 x 1.25 bolts which screw into the threaded holes in the crank pulley. Note that the spanner rests against the driveshaft to prevent it from turning as you undo the crank pulley bolt |
 |
The power steering belt requires removal before the crank pulley is removed. Either cut this off or, slacken the tensioning bolt and swing the pump towards the front of the car - note every belt I have done has been stiff to move and requires some "persuasion"! |
 |
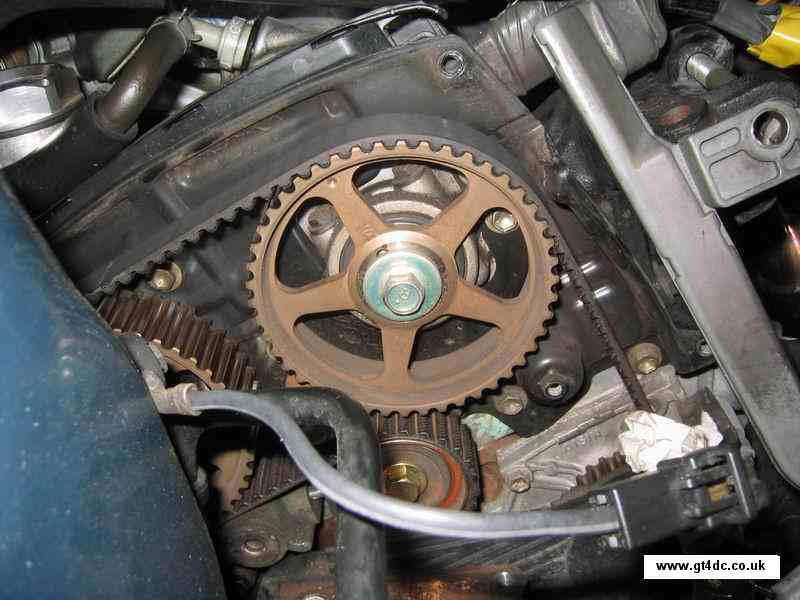
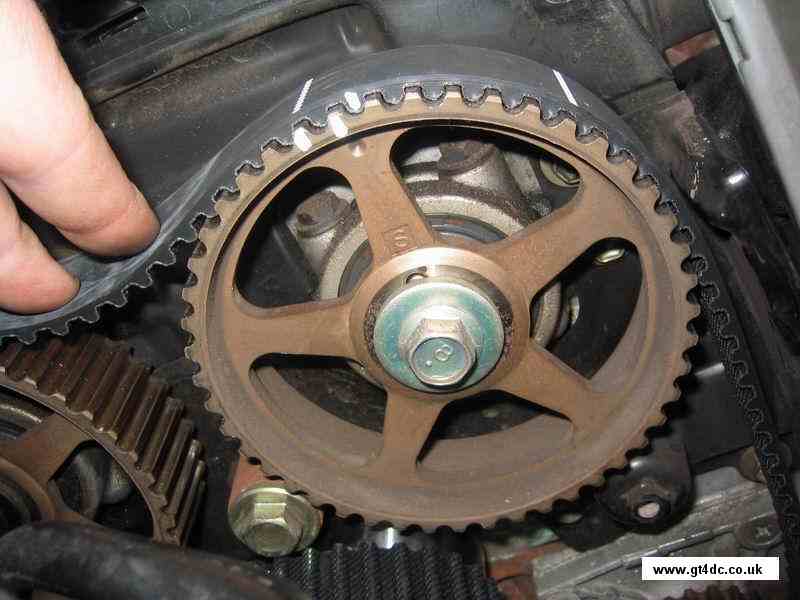
With the crank pulley bolt removed the pulley looks like this. Verify that the crank timing mark is still aligned with the zero mark
Next is to attach either a 2 or 3 leg bearing puller and remove the pulley from the crank |
 |
The lower timing belt cover can now be removed once the pulley has been taken off. Note that the crank pulley woodruff key may come loose - don't loose it! |
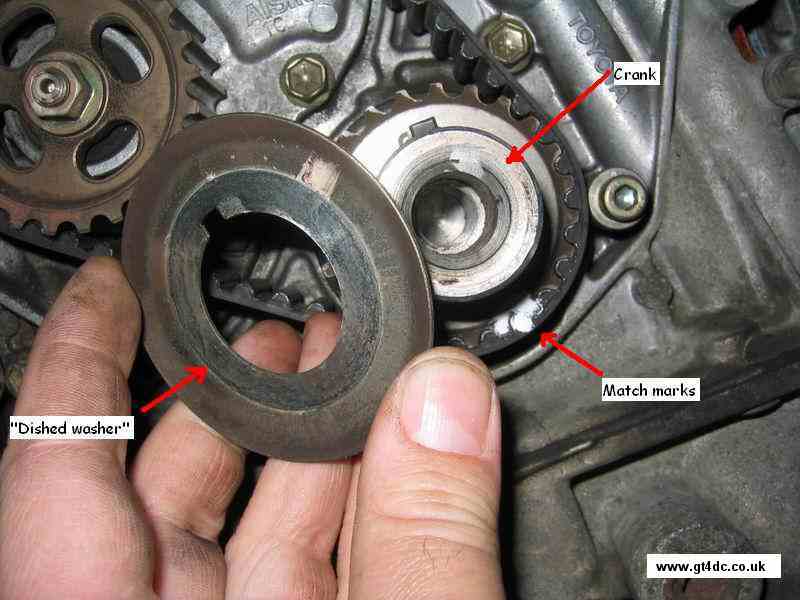 |
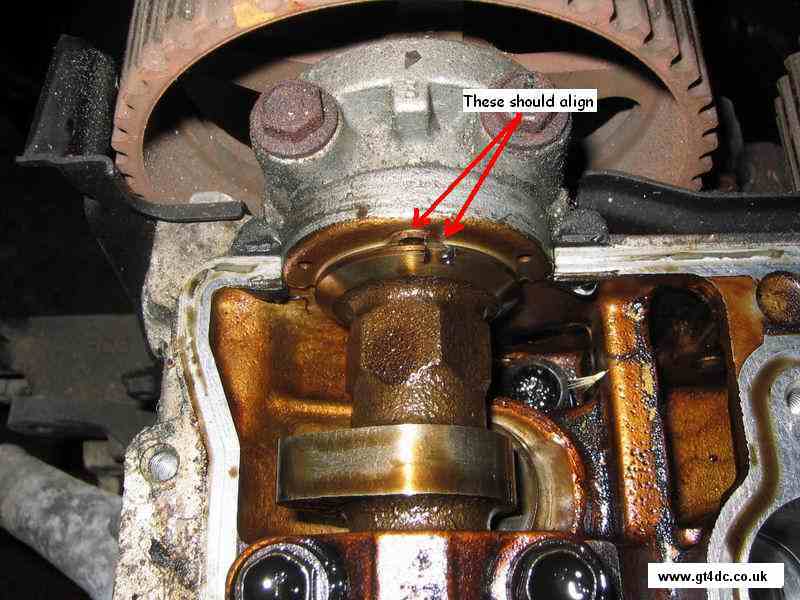
With the cover removed the first thing to remove if the "Dished washer". NOTE
THE ORIENTATION OF THE WASHER i.e. the dish faces away from the engine. Incorrect later fitting of this washer may spell doom. While you are at the crank, place some match marks on the old timing belt, either side of a mark on the crank with a marker pen or Tippex. Note from this point onwards, do NOT move either crank or camshafts, or you will have to verify that the timing is correct! |
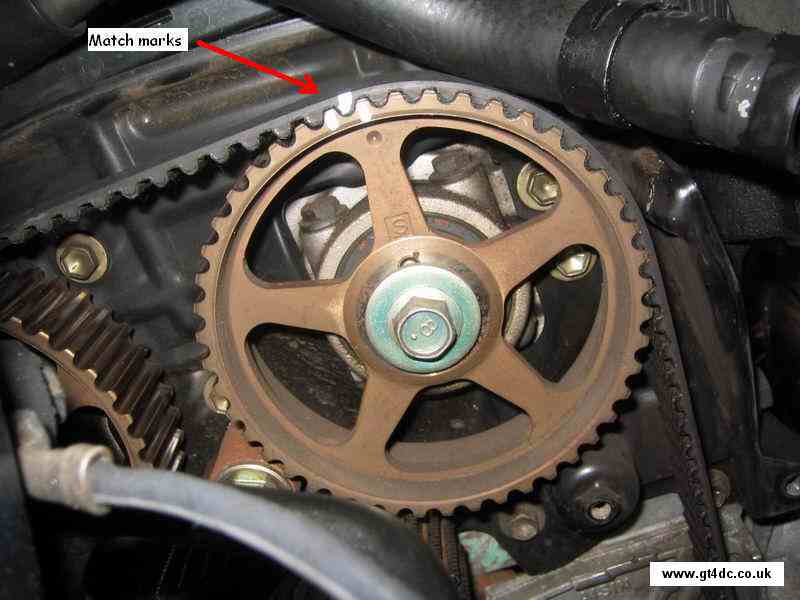 |
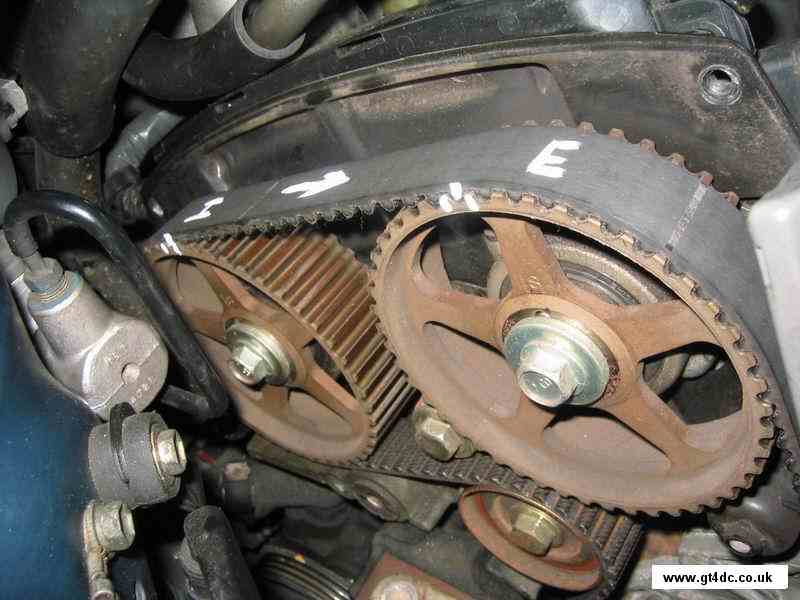
Now that the crank has some match marks, place some additional marks on the 2 camshaft sprockets. I also labelled the sprockets for Intake and Exhaust and direction of travel for the belt to aid clarity |
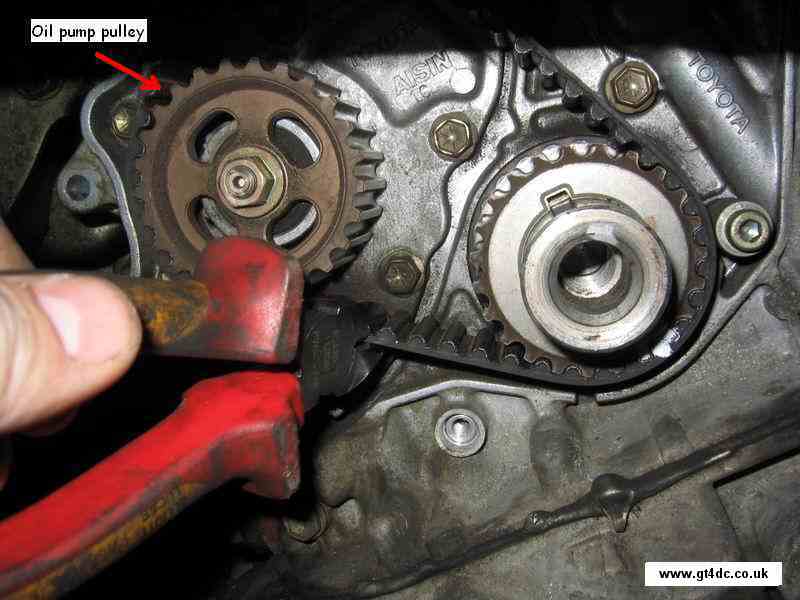 |
Check, check and double check that all the match marks are lined up and are clearly visible and unambiguous, this is your last chance to ensure it goes smoothly! Once you are happy your marks won't rub off and are correctly aligned, cut off the old cambelt from in between the crank and the oil pump pulley as shown |
 |
Simply pull the timing belt free from around all the pulleys and sprockets. Note that the camshaft sprockets WILL move due to the tension of the valve springs and the belt, do not panic, you have the original positions marked on the belt you are removing! |
|
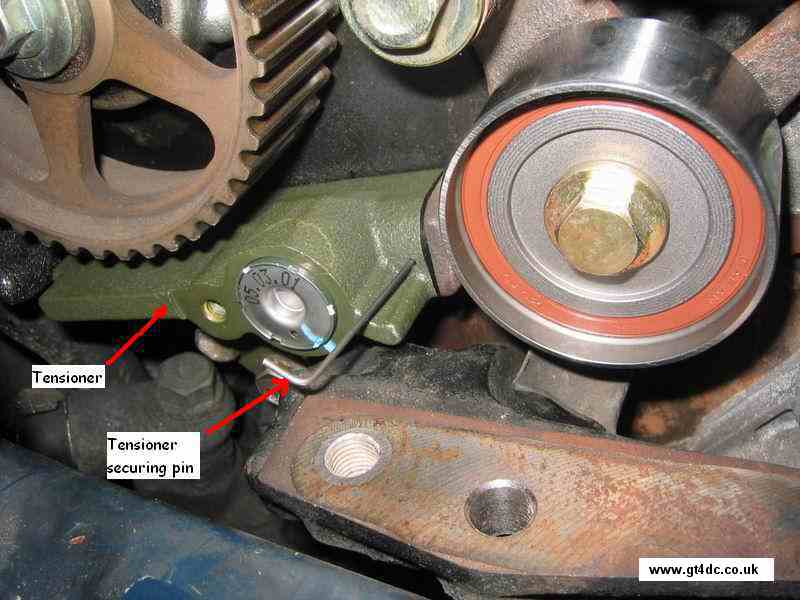
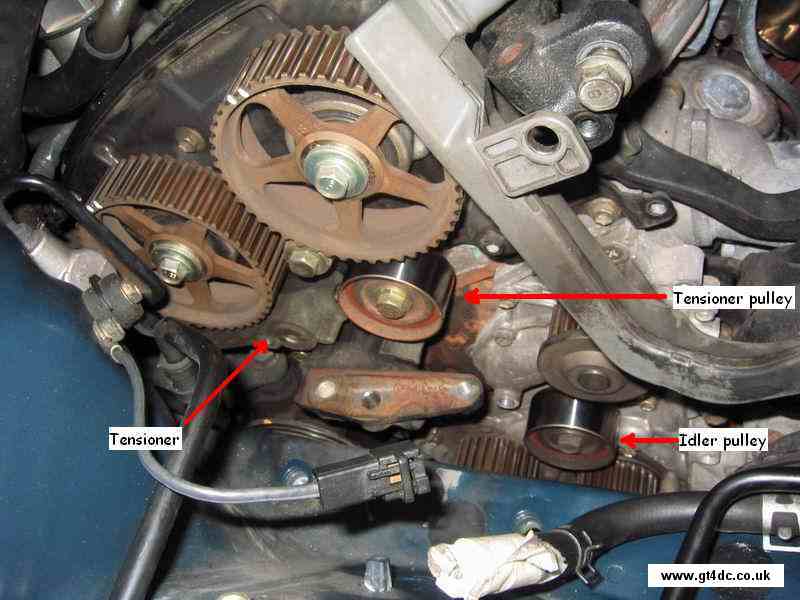
Before refitting of a new belt the old worn components need to be replaced. Indicated are the Tensioner, Tensioner pulley and idler pulley.
Replace each of these in turn, noting the following: Tensioner - remove the 2 bolts from below the Tensioner to release this. On fitting a new Tensioner, thread lock the 2 securing bolts and leave the securing pin in place until you are ready to tension up the new belt, as shown in the picture - tensioning up will be the last part of fitting the cambelt Tensioner pulley - Remove the bolt securing the pulley, NOT the bolt that secures the assembly to the block. You MUST ensure that thread lock is applied to the bolt threads on fitting of a new pulley Idler pulley - Remove the bolt securing the pulley. Ensure that thread lock is applied to the pulley bolt before re-fittingALL the above bolts should be correctly torqued to prevent possible future failure |
 |
Next up is to transfer the match marks from the old belt to the new belt. Ensure that all the marks are transferred accurately. Once you have checked and checked the marks, re-check them and then it is time to fit the new belt |

|
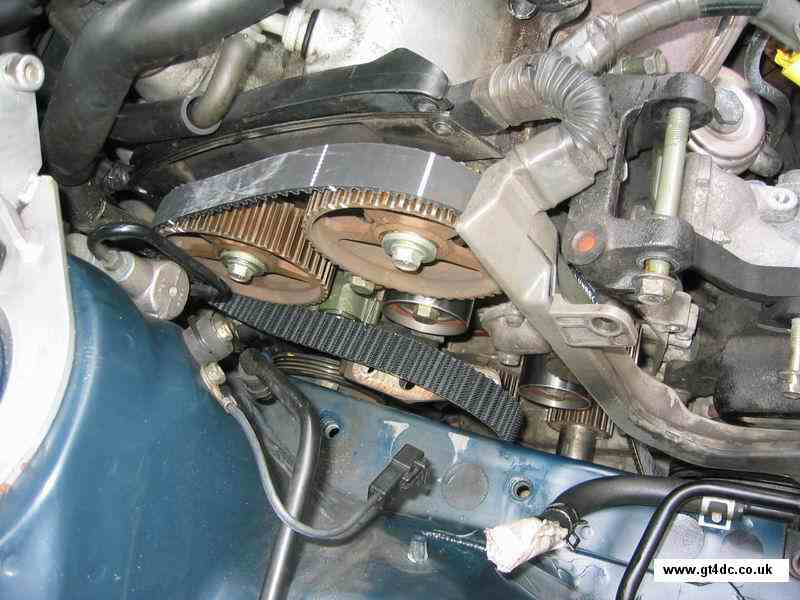
Slip the timing belt onto and over the pulleys. Ensure that the crank is the first position the belt is placed accurately into place, thread the belt over the other pulleys and then finally over the exhaust cam sprocket
Note that you may have to put the belt on at an angle on the inlet and exhaust sprockets in order to get the belt onto all the pulleys! |
 |
The last pulley to be aligned is the exhaust cam sprocket, (the one towards the front of the car) Note that the picture shows how far misaligned the timing can easily become. Expect to rotate the exhaust and/or the inlet sprocket at least 1 or 2 teeth - this can give you the feeling you have fouled up, you haven't! (If you watched the top of the cambelt when you cut and then removed the belt you will see how far these sprockets move!) Once the belt is aligned, (can be a bit tricky), you may notice that the belt is extremely slack between the 2 cam sprockets, don't worry as long as the match marks all align the slack will be taken up by the movement of the camshaft sprockets and the cambelt Tensioner |
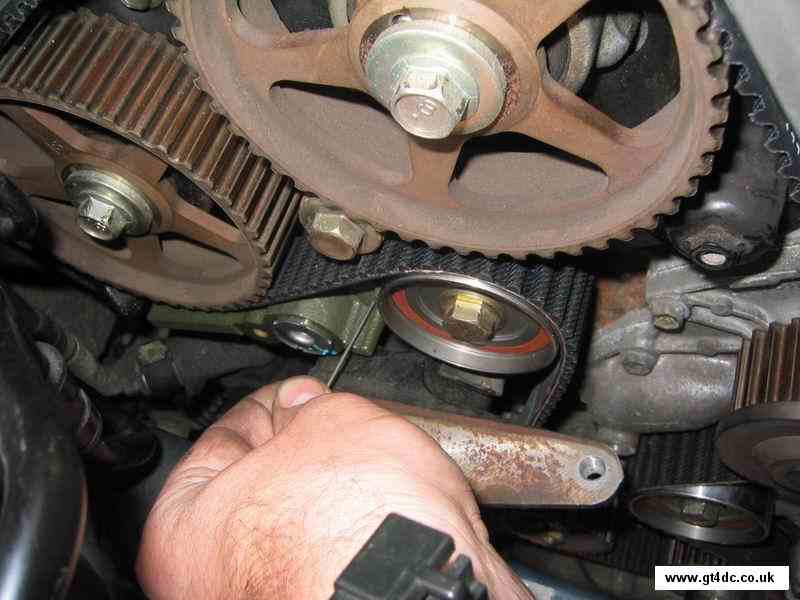 |
Once the match marks have been checked, double checked and then checked again you can pull the pin out of the
Tensioner assembly. By rotating the engine using the crank pulley nut you should see the slack disappear. Once again verify all the match marks are aligned |
| Re-fit all the items removed, and ensure the "Dished washer" is put back in the correct orientation. It might be an idea to put a small amount of copper grease onto the crank to ease removal of the crank pulley in the future should the need arise |